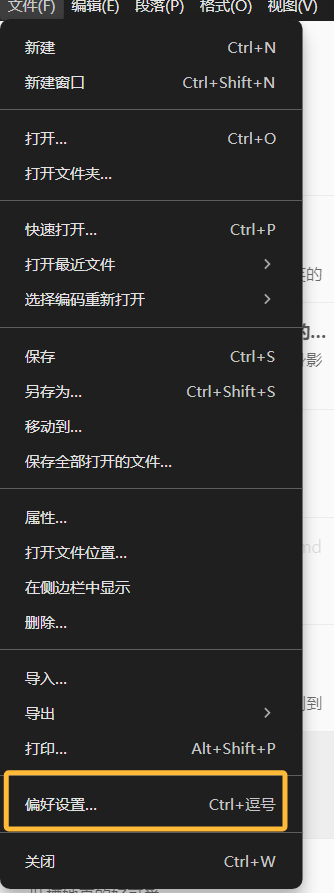
首先打开 Typora 设置找到偏好设置
图像设置里面有一个上传设置的功能
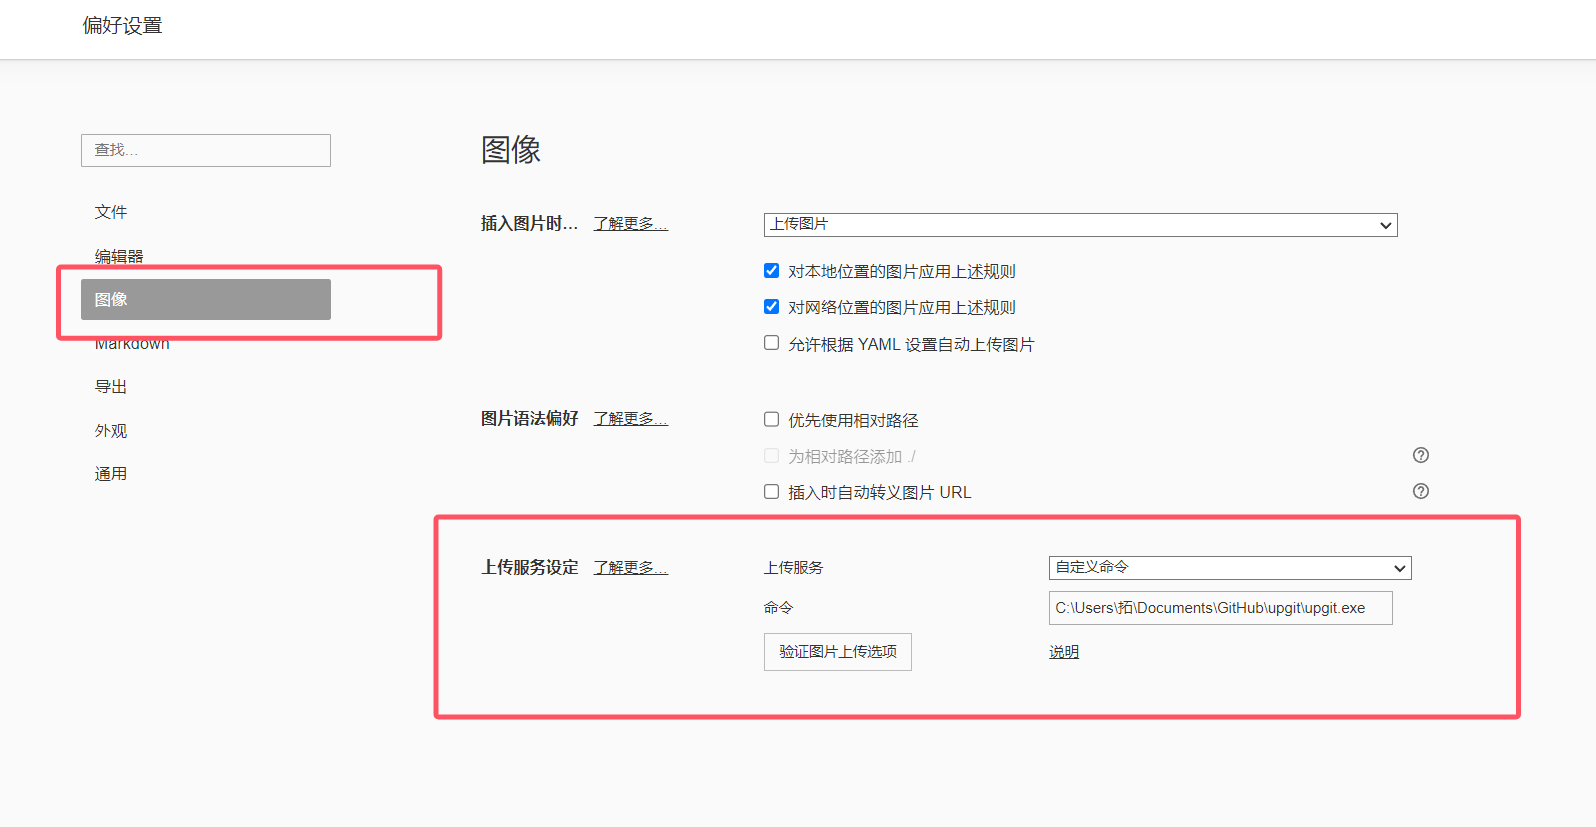
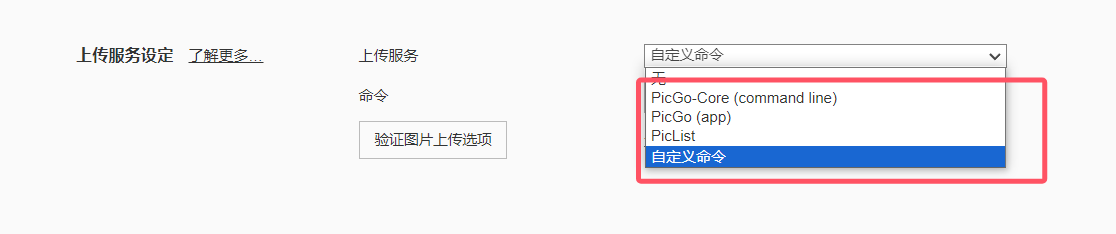
这里面有几项可以选择的上传服务,我试了一下,都挺麻烦的
但是这里是有说明文档的,所以不用担心
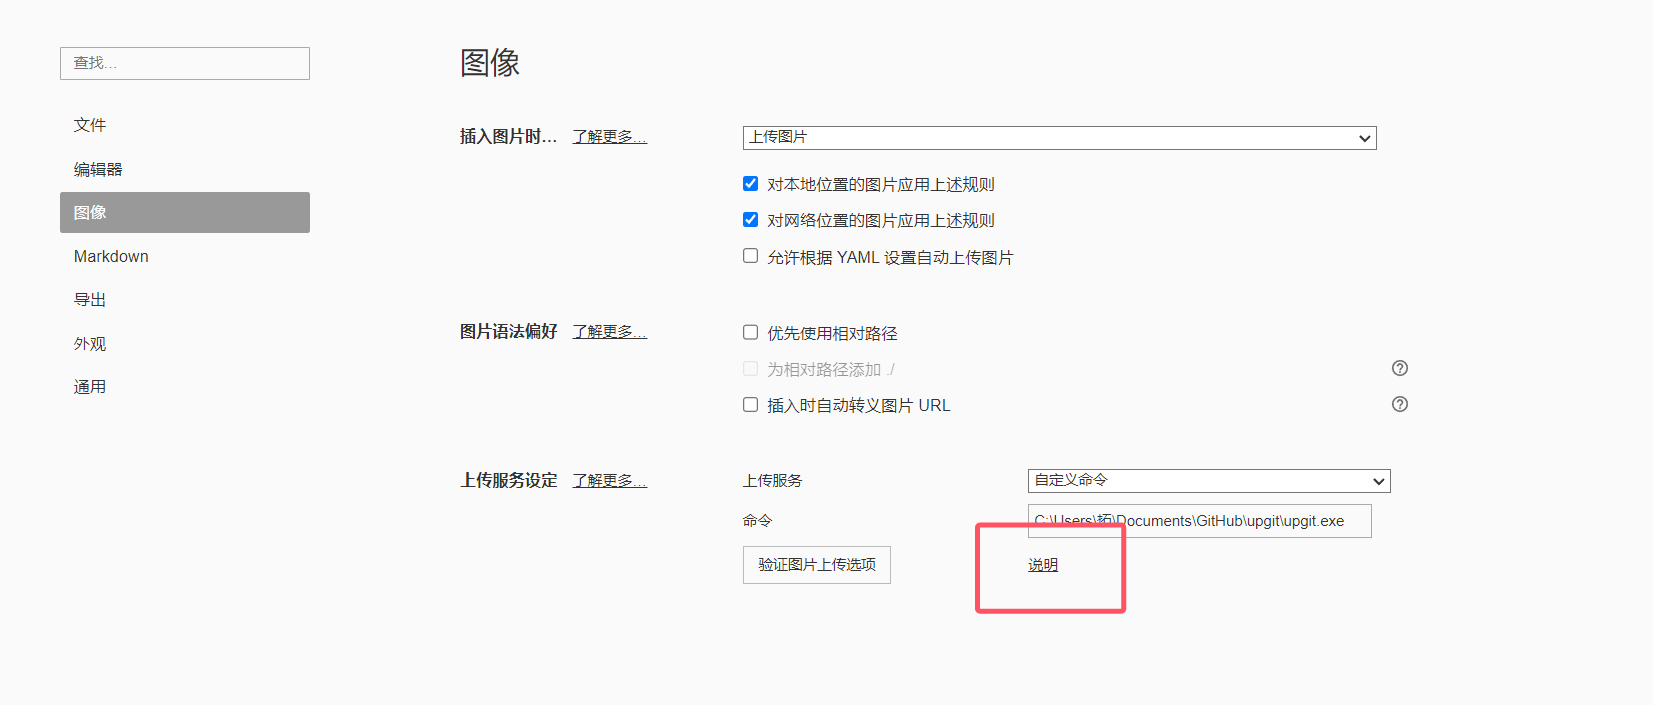
点击说明,跳转到官方的说明文档
我选的是这个 upgit,因为前面几个没整明白
首先到发布页下载程序,Windows 一般选 upgit_win_amd64.exe
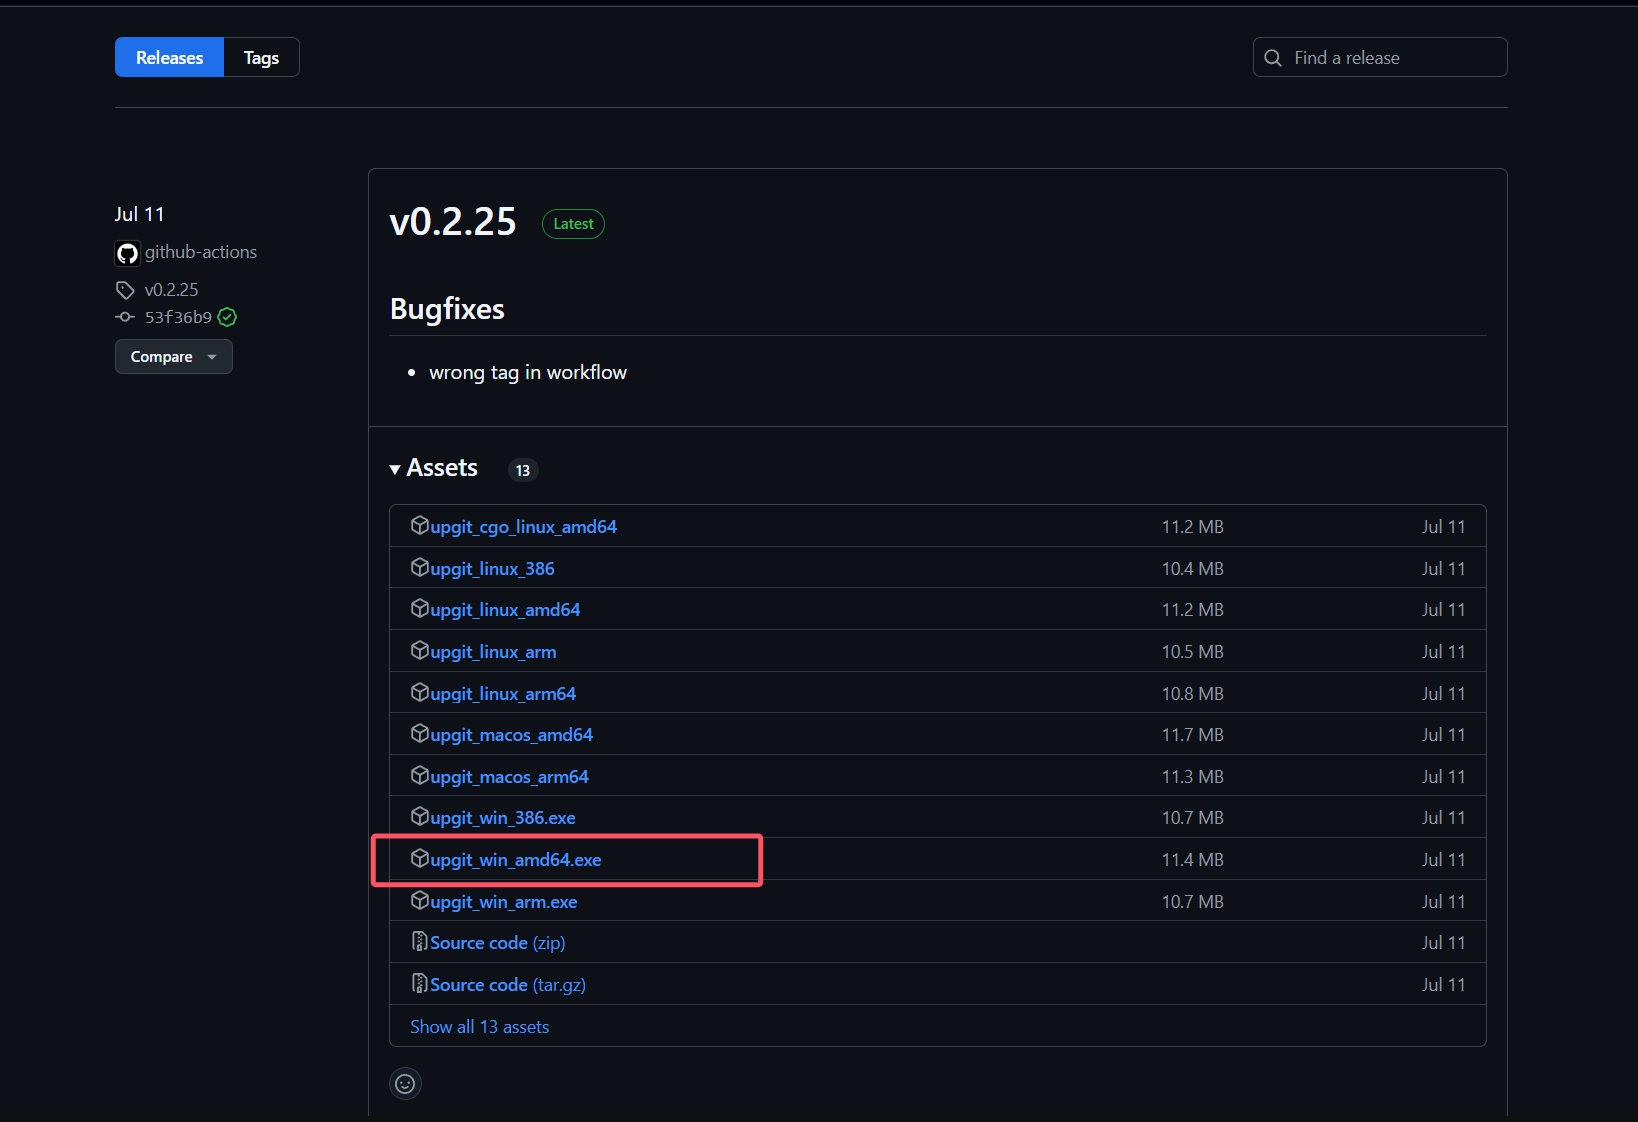
然后重命名为 upgit.exe,放到一个你找得到的位置,但是不能是那种需要管理员权限的文件夹
然后新建一个叫做 config.toml 的文件
按照官方给出的参考填写配置文件
我使用的 GitHub 做图床,配置如下仅供参考
# =============================================================================
# UPGIT Config
# =============================================================================
# default uploader id
default_uploader = "github"
# The file name formatting template is applied when uploading
# / is directory separator used to distinguish directories
# {year} Year, for example: 2022
# {month} Month, for example: 02
# {day} Day, for example: 01
# {unix_ts} Time stamp, for example: 1643617626. If you're uploading frequently, try {unix_tsms} to escape name repeating
# {fname} Original file name, such as logo (without suffix)
# {fname_hash} MD5 hash value of {fname}
# {ext} File name suffix, for example: .png
# The following example generates a file name like: 2022/01/upgit_20220131_1643617626.png
rename = "{year}/{month}/upgit_{year}{month}{day}_{unix_ts}{ext}"
# -----------------------------------------------------------------------------
# Custom extra output formats
# -----------------------------------------------------------------------------
# {url} direct URL of the file
[output_formats]
"bbcode" = "[img]{url}[/img]"
"html" = '<img src="{url}" />'
"markdown-simple" = ""
# -----------------------------------------------------------------------------
# URL replacing rules. Process: RawUrl -[replace]-> Url
# -----------------------------------------------------------------------------
# If your network access to Github is abnormal or sluggish, you can try the following CDN acceleration.
# [replacements]
# "raw.githubusercontent.com" = "cdn.jsdelivr.net/gh"
# "/master" = "@master"
# =============================================================================
# Configurations examples for some uploaders, leave them blank if not used
# =============================================================================
# Github uploader
[uploaders.github]
# Branch to save files, for example master or main
branch = "你的分支名"
# "pat" enter the Github token that has the "repo" permission
# Get token from https://github.com/settings/tokens
pat = "你的 tokens"
# The name of your public Github repository
# Attention: In order for you and others to access image resources, your Github repository must be public.
# In private repositories Github blocks unauthorized requests and you will get a 404.
repo = "你的库名"
# your Github username
username = "你的用户名"
把需要填写的部分填好了就可以使用了
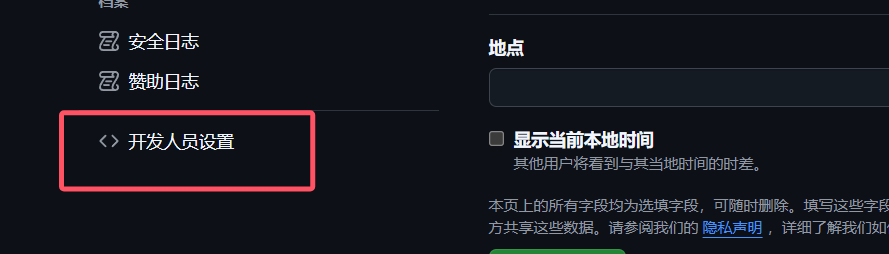
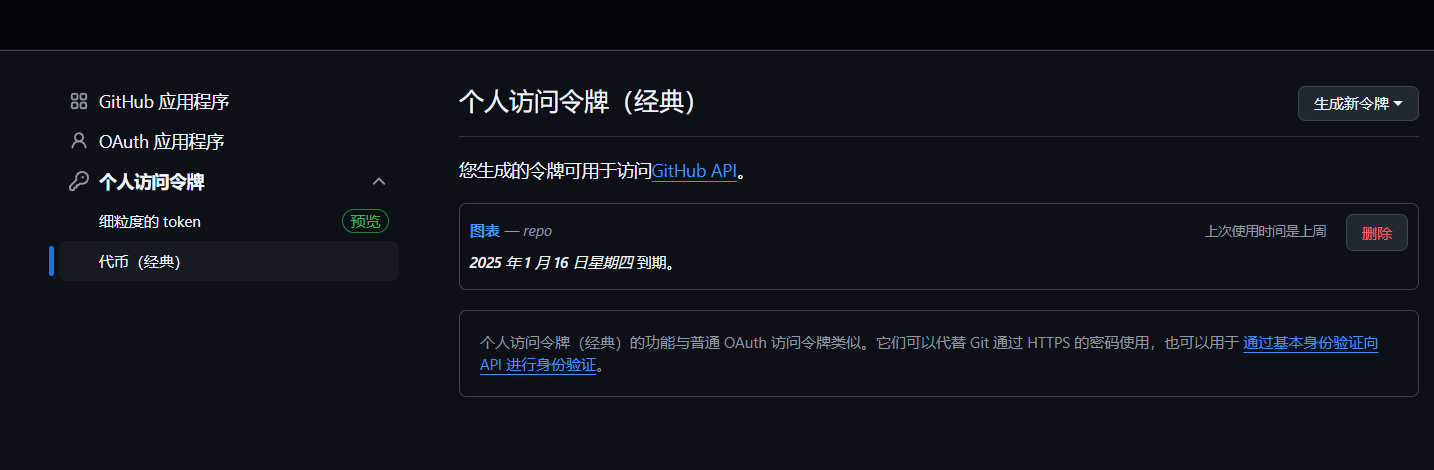
需要注意的就是 tokens,需要在 GitHub 设置的左下方选择开发人员设置
然后选择你的库生成一个 tokens
然后 Typora 上传服务选择自定义命令,填写 upgit.exe 的文件路径
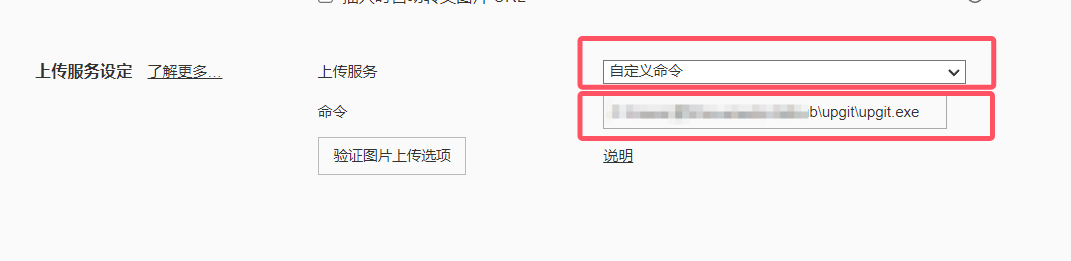
点击验证图片上传选项
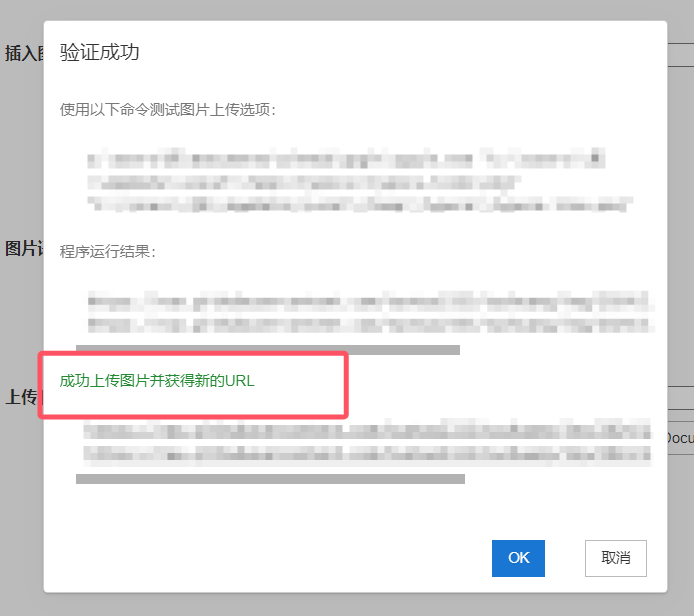
显示成功上传图片就是可以了
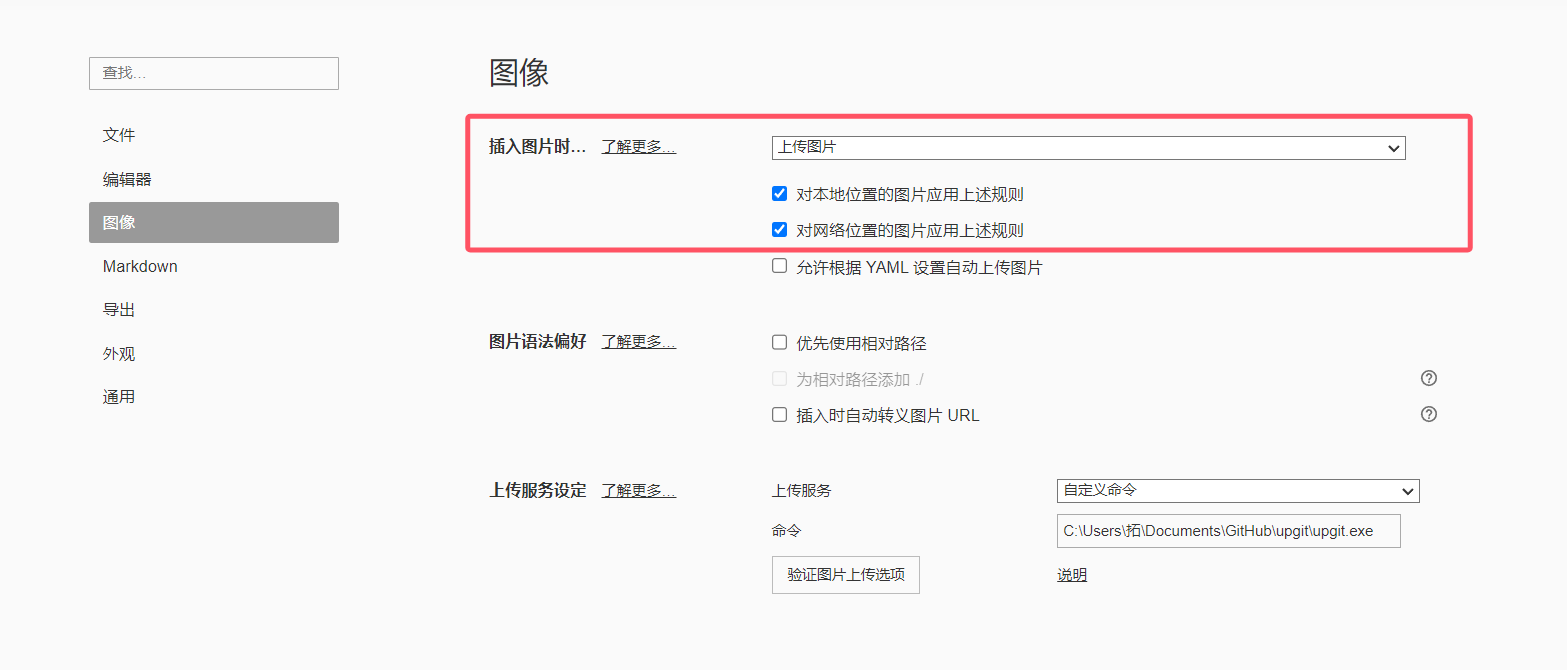
接下来我们把插入图片时的操作修改一下
改成插入时自动上传,并对本地和网络图片应用该规则
好了,这下放进去的图片就都会自动上传到你的 GitHub 图床里去了